Показаны сообщения с ярлыком Scrapbooking on a Budget. Показать все сообщения

пятница, 5 сентября 2014 г.

Scrapbooking on a Budget - secret #19.

Hello friends! I would like to share another little secret in the Scrapbooking on a Budget series. This one is related more to cardmaking than actual scrapbooking, but it seems like we all like to do both anyway!


Secret #19: Make as many cards as possible from one tag and cutouts sheet of paper. 

Tags are so versatile! They go perfectly as an embellishments on a page as well as a focal point on a card! There are so many different companies that make those papers with tags or 3x4 cards now, but some of my favorites are by Crate Paper.


Crate Paper usually fits 18 tags on one sheet of paper which means you get 18 tags for just .99 cents. (It's four times cheaper then getting a bag with premade tags that usually run about $3.99 per pack of 12.) Using one of these papers plus scraps or a 6x6 paper pad in matching colors, you can make up to 18 cards! I like to double or triple tags on my cards, so I usually get about 6 to 9 cards.


Here is an example of how I used one sheet of papers from Little Boy Blue collection to make five cards for a Baby Shower or a boy's Birthday.


Card # 1: To brighten up brown tag, I added pop of yellow color...


Card #2: For this one, my color combination came from little birds on a smaller tag...


Card #3: I loved that green tag - it already had a sentiment for my card!


Card #4: A little different color combination here, and the sentiment says "Congrats" which can be stretched a little further... I could easily address this one to a girl with Fall birthday.


Card #5: Very traditional baby boy card in white, blue and grey.


I hope I've inspired some of you to create as many cards as possible from one sheet of paper with cut out tags. Send me a link if you give this a try, I would like to see it!

To see more posts on this subject, just click the link on a right side panel under Labels "Scrapbooking on a Budget".  

Thanks for visiting and have a great weekend!

среда, 30 июля 2014 г.

Scrapbooking on a Budget - secrets 16 - 18!

Hello friends! It's been forever since my last Scrapbooking on a Budget post. Today I want to share a few of my favorite secrets! They are all related to the same topic, but are important enough to be highlighted separately.


Secret # 16: Use your scraps.

We all like new products and new papers, but once in a while it's good to create a page or a few cards using just what you can find in your scraps. At some point all of those papers were new and loved. Another interesting fact is that since all of the papers in your scraps are cut into various pieces, they may actually guide you in a slightly new direction while designing your page.

A few weeks ago, I challenged myself to make a page using only scraps and here's what I got.


I picked a color combination and started pulling out pieces of paper that matched it. Even my background yellow paper is a combination of two pieces - it has a space in between, but I knew my photos will cover the space.

Some of these papers are older - like the one with white dots on green from the Scenic Route paper company that doesn't even exist anymore; and some were bought on my last trip to LSS - like that gray diagonal stripe by October Afternoon, but was already used for another project earlier.


Here is a close up for those who likes to read the story and check out the details. ( I just realized I haven't stitched anything on the page... that's really rare for me :)


Another example of using scraps is a set of five cards I shared last week - yes, all of them were made using scrap pieces of paper. That's actually one of my favorite way to use up some of the leftovers because cards don't need big pieces of paper.

Secret #17: Make your scraps easy accessible!

That's a big one. It made a huge difference for me when I changed the storage solution for my scraps. I used to keep them in colored plastic envelopes -


but honestly, as soon as I placed anything there I lost interest and value of that item pretty much immediately and I never, seriously never wanted to pick up an envelope and start searching for a paper unless I specifically new what I was looking for. Even though in the beginning it seemed like a perfect solution, I hated taking everything from an envelope to look for something I might use.

After getting a new scrap table, I changed the storage solution and that changed the way I look and treat my scraps today!


I have a long and skinny drawer right in front of me. I placed three lids from old decorative boxed that measure about 6x10 each, and sorted my scraps in three categories:

1. papers in blue and green colors
2. pink and grey, and some purple (I don't have a lot of those)
3. yellow, orange, red and brown.

I have a separate little drawer full of white scraps of paper, because I use a lot of whites.

Now, it's easier to pull out my drawer and check if I have something there before going to my new stash. But there's one more thing to it - what do you consider a scrap? Since my boxes are only 6 inches wide, anything larger than 6 inch, I keep with regular or new paper on my paper rack.

Secret #18: Any paper larger than half the original size keep with new supplies. 

This way your paper rack will always look fuller and will not make you go and spend even more money on new supplies! I never consider a piece of paper scrap if I only cut three inches off of it. If it doesn't fit into my drawer - it is kept with the new papers (unless I don't really like it anymore, then my daughter gets it).

I hope you could find some of these tips helpful. Thanks for stopping by and enjoy scrapping!

See you soon!

понедельник, 7 апреля 2014 г.

Scrapbooking on a Budget - secrets 14 & 15

Hello! I really had to take a break last week, because of a crazy busy schedule, but I'm so happy to be back! Even though I didn't have much time for scrapbooking, while cleaning my desk I was suddenly inspired by a color combination and that's how another page was born. Today I wanted to share it in a form of another secret of the Scrapbooking on a Budget series!


This one shouldn't cost you anything. All you have to do is check your supplies. You may have done that before, but if you didn't, you might be surprised to find something you wouldn't have thought of to use on a page before.

Secret #14: Use packaging as embellishments.

A while back I bought a clear Butterfly stamp set by Martha Stewart.

The packaging included clear plastic with images of the included stamps. So, I've decided to cut it up and use these beautiful transparency butterflies on a page!


I love how something I already had on hand could become a totally new item in my embellishment box. Here is a look of the whole page:


I wanted to go for a very simple look on this layout to balance all the journaling. Also, while making this page, after getting pretty much everything done, I found two more pictures from the same event, that I really wanted to add, so I've adhered them under the PL card.


Even though this page is going to be inside a sheet protector, and probably not too many people will ever see these photos, it was kind of a relief to know they now have a home on a page. I guess it may also serve as a little surprise to a very curious person someday.

Secret #15: Use office supplies in your scrapbooks. 

I'm sure many of you are familiar with this item and might have it in your home. Usually this package contains hundreds of these little ring stickers and you may have a lot of leftovers like I did.

They were originally designed for reinforcing a hole on a page with punched holes, but who said you can't use it on a scrapbook layout to reinforce the design on pattern paper?


I loved the effect! It might be very subtle here, but it adds a little more interest and dimension to the page.You can also use it as mask before adding mist to the page or put them in a row to make a scalloped edge border.

Here's the list of other Scrapbooking on a Budget related posts if you are interested:
Scrapbooking on a Budget - secrets 12 & 13
Scrapbooking on a Budget - secret 11, Scraplift!
Scrapbooking on a Budget - secret 10: 12x12 vs 8.5x11
Scrapbooking on a Budget - secrets 6-9: Make your own.
Scrapbooking on a Budget - secrets 4,5: Printables
Scrapbooking on a Budget - secrets 1,2,3.

Thank you for visiting and I'll be back very soon with more to share!

понедельник, 2 декабря 2013 г.

Scrapbooking on a Budget - secrets 12 &13

Hello December! Can't believe "The most wonderful time of the year" is finally here! I wish everyone this December to really be that most wonderful time! It's cold and busy, but there's always something magical in it!


I have two more little secrets to share today in Scrapbooking on a Budget series.

Secret 12: Use your favorite product.

I know, at first it doesn't sound like a money saving tip, but believe me I have a good point behind it. Scrapbooking industry continuously provides us with new products, new lines and other new stuff. I remember a while back, getting a few pieces of paper that I really loved. But I wasn't using them because I loved them too much. I didn't want to ruin them and kept waiting for a perfect moment to use them. I always thought there will be a more special project I can use these on. But as time has passed, my likes have changed, hundreds more of beautiful papers were released and I still have that paper in my stash. Plus, it's not in the "favorites" section anymore.

So now, whenever I get new paper, I cut into it as soon as I get a chance to scrapbook. Sometimes it's the same day. This way, I work with the stuff I like today and enjoy doing so! I know there will always be more new and special paper I will love.

During the last CHA release, there were two lines that I liked the most: Santa's List by Teresa Collins and 'Tis the Season by Echo Park.


In my last order from TwoPeas I got a couple of pieces from each collection and enjoyed working with them right away. I made two cards using this piece of papers from Echo Park:


Here is the first one, using a tag with a deer:


And here's the other one mixed with a few pieces from Teresa Collins collection:


Covered white rose with glitter for snow effect:


Obviously, we can't use all the new stuff at once, but I never wait for a perfect moment or a perfect project anymore! I use it now because I love it, unless I've ordered it for a specific project.

Now, you probably have a question, what to do with those papers that we fall out of love with? I guess, there could be a number of different options like giveaway, share, mix old with new, but my favorite is - re purpose it. And that's our next little secret:)

Secret #13: Re purpose.

I get through my supplies periodically and put aside not-so-loved-anymore papers, or the papers that were in the paper pack that I never liked in the first place. I don't throw them away. I like to use them to make little gifts, getting double joy doing so - I don't feel like I wasted money and I am able make someone happy!


I like to make little journals for little kids. They love them! This simple gift totally made Liana's day! She was carrying it around all day and even took it to bed with her!
I totally adore Webster's Pages paper, but for some reason I have difficult time using it. It's too pretty by itself. I collected a few pieces and now use them as covers for these books! They work perfectly! To protect that cover, I cut a plastic file folder to size (got a pack of 6 for .50 cents at a local office supplies store that was going out of business) and added to front and back of the book.


Here is the simple recipe for a handmade journal:

Collect a few papers form that "not-favorite-anymore" pile in a color scheme of your choice.
I usually gather about 4 to 6 pieces of paper.
Cut each 12x12 sheet of paper into two 8.5x6 pieces.
Get a pack of lined paper from Office supplies store, and cut 1/4 of the pack into 8.5x6 also.
Punch holes in all of them using a few pieces at a time.
Add cover, rings, envelopes, coloring book pages (you can find some HERE to print at home).
Tie a ribbon and deliver a little joy to someone special in you life!


These may work great as Christmas gifts too!

Speaking of Christmas gifts, I did my Black Friday shopping online and LOVED it! No lines, no traffic, no getting up at 6 in the morning! Waiting for a few packages to arrive this week :)

Got to go now. I hope you have a wonderful day!

Here's the list of other Scrapbooking on a Budget related posts if you are interested:
Scrapbooking on a Budget - secret 11, Scraplift!
Scrapbooking on a Budget - secret 10: 12x12 vs 8.5x11
Scrapbooking on a Budget - secrets 6-9: Make your own.
Scrapbooking on a Budget - secrets 4,5: Printables
Scrapbooking on a Budget - secrets 1,2,3.

Thank you so much for stopping by!

See you soon!

среда, 23 октября 2013 г.

Scrapbooking on a Budget - Scraplift!

 Hello everyone! Don't you love how scrapbooking hobby gives you so many different outlets to express yourself. Some days you feel like blogging, other days you just wanna stay at your table and create, create, create. That's where I've been missing :) It happens each time I clean my table. I mean when I reeeally clean and reorganize it.


Today I wanted to share another "Scrapbooking on a Budget" secret and two more pages! It may not seem related to Budget at first but I have my reason's behind it :)

Secret #11: Scraplift to save time and money.

There are at least three reasons why scraplifting helps you stay on the budget.
  1. First of all, scraplifting saves time, weather you make a very close lift or use a partial idea like photo placement, design, or color combination. 
  2. It's pretty easy to guess pieces of papers you will use by checking project you are scraplifting, so you don't waste your favorite product by cutting a bigger piece and then cutting away smaller pieces that will not be good for anything else.
  3. Scraplifting is a great exercise for beginners especially. You can save money on classes, since some classes teach by making you copy a project anyway. There are ton's of great classes and workshops that teach you more amazing thing's and techniques, but you can start learning by scralifting.
I have two examples for you today. First one is a very close scraplift of a layout by Jennifer Gallacher.  Jennifer is one of my most scraplifted scrapbookers. When I saw THIS page, I knew I will be scraplifting it! I just wanted my album to have one like that too. I started making this by choosing products that were as similar as possible to the ones she used.


 I did just a few minor changes along the way like including my journaling in a different spot and to shrinking her 12x12 page into a smaller 8.5x11 size. But the outcome is pretty similar.

 
After making this page, I learned that I love using arrows on the page and I started including them a lot more often now.

My second page was inspired by Nichole Magouirk. I love the way she used butterflies on THIS page, and I love her color combination here. Again, I did my page on a smaller format. Used two photos instead of one. Used papers and products I had on hand, not trying to match any of hers. But I had a visual example that took all of the guessing work out of the game. This layout came out pretty quickly.


The story is about Liana's uncle that always needed a kiss from her...


All of the butterflies were cut with Cameo, which made all the detailed work of the page - a piece of cake. All I had to do is change the size and pattern paper. I used a stamp by Les Papiers de Pandore and a few printables by Heidy Swapp.

And of course I have to mention, that scraplifting is allowed and even incouraged as long as we mention the name of the artist who made the original project. I can tell from my own experience, it was so nice to receive an email from a lady across the country telling me that she scraplifted one o my pages. She also left a link, so I could go check her scraplifted page out. Feels great knowing, that someone was inspired by your work!

If you are interested, here's the list of previous posts on this subject:
Scrapbooking on a Budget - secret 10: 12x12 vs 8.5x11
Scrapbooking on a Budget - secrets 6-9: Make your own.
Scrapbooking on a Budget - secrets 4&5: Printables
Scrapbooking on a Budget - secrets 1,2,3.

Thank you everyone for stopping by! I hope you have a wonderful day and I'll see you next time!

Happy scraplifting!

воскресенье, 8 сентября 2013 г.

Scrapbooking on a Budget - 8.5x11 vs 12x12

Hi! Today I wanted to share a new page and two more secrets for scrapbooking on a budget.

It has been a big dilemma for me to decide which size I want to scrapbook. Like many of you I started scrapbooking with 8.5x11 size. Then I completely switched to 12x12. After reading Ali Edwards's blog, I realized it was totally fine to do both sizes and I did that for a while. About 90% of my pages were 12x12 though. But this year I switched back and now about 90% of my pages are 8.5x11.

I made that choice based on two reasons. One - I noticed that each time I wanted to share an album with a guest, I felt more comfortable pulling out a smaller album. And two - the person who is most interested in these albums right now is my 5 year old. She loves flipping through the pages of my scrapbooks.


 But 12x12 album looks just a little too big for her...


It may be ok when she is sitting down, but taking such a large album from the bookshelf and placing it back is always a problem. She can handle the smaller one herself, but with 12x12 album she usually needs assistance...

That was my main reason to switch back to 8.5x11, the other benefit of it was - it was fitting my budget so much better! Yes, that's my next secret.

Secret #10: Scrapbook 8.5x11 size.

There's still plenty of room to play on this size of paper! It's an ideal size for one photo layouts. For the rest of them I just use smaller photos. I often print two photos on one 4x6 print as shown here. Most of my pages have 1-3 photos on them but I did manage to fit 9 photos on 8.5x11 layout before. Yes, they were small, but they seemed perfectly sized when served as a supportive element on a story based layout.


By making 8.5x11 scrapbook pages, you don't just save on paper that goes on the page...


... the biggest money saver here is in a storage solution for our masterpieces! Here is a rough example on storing both sizes of scrapbook pages. Sorry, we have to do a little math here :)


An average 12x12 scrapbook album costs $22. They usually range from $15 to $29. A pack of ten 12x12 page protectors are about $5. One 3 ring binder can fit 20 to 30 pages. To store 30 scrapbook pages, will cost you approximately $37.


An average 8.5x11 scrapbook album is five to ten dollars cheaper. If we talk real budget, you can get a plain 3 ring binder in an office supply store for under $5. I bought mine for $3.99. A pack of 50 sheet protectors are around $7. To store 30 scrapbook pages, will cost you approximately $9.


Both of my albums here have 30 pages in each.

I know this would not work for everybody. Some of you prefer larger square format. And that's the beauty of this hobby - we have so many choices! I'm not trying to convince anyone to scrapbook 8.5x11, but if your budget stops you from recording your memories, that's the way to go! My decision was made on how these albums were used, after I spent all those hours making pages and money saving came as a bonus :)

Here are a few links to blogs of some of my favorite scrapbookers who do a lot of 8x5x11 pages. Check them out: Jen Gallacher, Jen Jockisch, Geralyn Sy, Sasha Farina.

Secret #11: Buy 6x6 paper pads instead of 12x12.

Buying 6x6 paper packs instead of 12x12 is another money saver. And these papers work perfectly on 8.5x11 layouts.


Sometimes we like to have it all! But I know what I use, so I have to be very selective. I buy only a few pieces from collections I like, but when I like the collection a lot, I get one or two 12x12 pieces of paper from it and a 6x6 paper pad. This way I still get every pattern that was there, still get to enjoy the entire collection, but for a lot less money. A full size paper pack is usually around $19, when 6x6 size is $5 to $6.


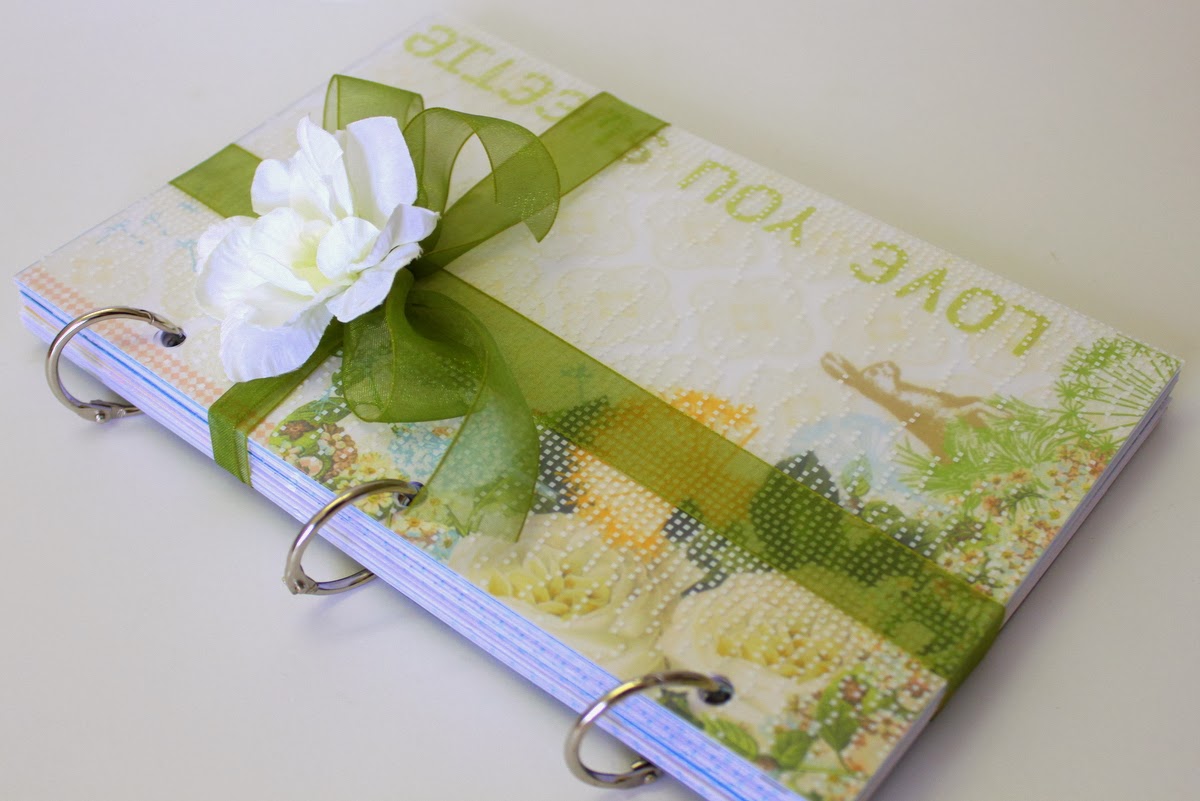
The page I shared today was made completely of 6x6 papers by Echo Park, except for one strip of paper by Basic Grey on the left side of the page.

Here are a few links to my favorite 6x6 paper packs that I would like to add to my collection: by Teresa Collins Santa's List and Memorabilia, by Echo Park Paper Beautiful Life and by Basic Grey Hey You

Thank you so much for stopping by! Have a great weekend and I hope to see you soon!

Always love hearing from you :)